




Many homeowners and contractors view a square footage calculator as a simple digital shortcut. Yet, relying solely on these tools without understanding the nuances of measurement often leads to costly errors, project delays, and wasted materials. The honest answer to achieving true square footage accuracy for critical projects demands more than just plug-and-play; it requires an understanding of underlying geometry and real-world measurement challenges.
Last updated: July 30, 2026
Key Takeaways
- Accurate square footage calculation are crucial for budgeting, material ordering, and avoiding costly project delays.
- While online calculators are helpful, precision starts with careful manual measurement and understanding complex geometries.
- Use advanced tools like laser measures for greater speed and accuracy, especially in larger or irregular spaces.
- Always account for material waste by adding a surplus (typically 10-15%) to your total square footage.
- Regularly verify measurements and re-calculate, particularly before making significant purchases or commitments.
The Hidden Costs of Inaccurate Square Footage Estimates
Inaccurate square footage calculations are far more than just minor numerical errors; they can derail a project budget, timeline, and even its quality. Underestimating leads to material shortages, requiring costly rush orders and delaying work. Overestimating results in wasted materials, storage issues, and unnecessary expenses that cut into your overall project savings.
For instance, a miscalculation of just 50 square feet on a flooring project priced at $4.50 per square foot means a $225 error in material cost alone. This doesn’t even account for potential labor overruns or the frustration of stopping work to wait for more supplies. Precision in measuring square footage is foundational for any successful home improvement or construction effort.
Essential Tools for Precision Measurement
While a standard tape measure is a fundamental tool, achieving true accuracy, especially for larger or more complex spaces, often requires an upgrade in your toolkit. Modern technology offers devices that can significantly enhance speed and precision, reducing the likelihood of human error.
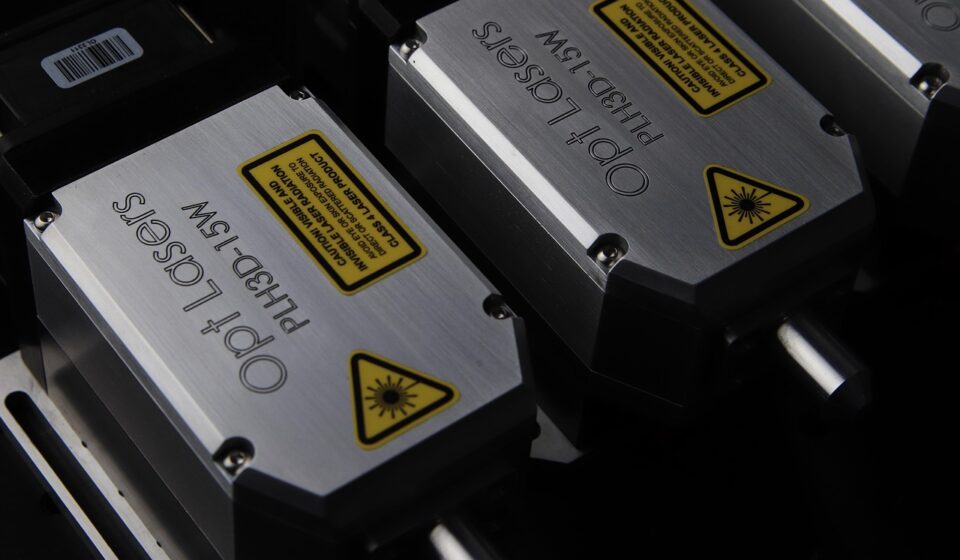
Laser distance measurers, for example, can capture dimensions with sub-millimeter accuracy over long distances, making them ideal for large rooms or outdoor plots. Digital measuring wheels are excellent for quickly covering long, straight lines in outdoor projects. Even a simple clipboard and graph paper can dramatically improve organization for recording multiple measurements.
Comparison: Manual vs. Digital Measurement Tools
| Feature | Standard Tape Measure | Laser Distance Measurer |
|---|---|---|
| Accuracy | Good for short distances, prone to sag over long spans | Excellent, typically ±1/16 inch over 100+ feet |
| Speed | Slower, requires two people for long measurements | Very fast, often one-person operation |
| Ease of Use | Simple, manual reading | Digital display, often includes area/volume functions |
| Cost | Low (typically $10-$30) | Moderate to High (typically $30-$200+) |
| Ideal For | Small rooms, detailed carpentry, short measurements | Large rooms, high ceilings, complex shapes, quick estimations |
For most DIY enthusiasts, a good quality 25-foot tape measure and a basic laser measurer (starting around $30-$50) offer a powerful combination. According to a 2025 survey by Construction Today, professionals using digital measurement tools reported a 15% reduction in measurement-related errors compared to purely manual methods. This reduction translates directly to material savings and improved project efficiency.
Step-by-Step: Accurately Calculating Area for Any Space
Calculating square footage involves breaking down complex spaces into simpler geometric shapes and summing their areas. This systematic approach ensures no section is missed and minimizes errors.
- Prepare Your Space and Tools: Clear the area of obstacles. Gather your measuring tools (tape measure, laser measurer, notepad, pencil/pen, graph paper). Ensure your tape measure is clean and not bent, which can affect accuracy.
- Sketch the Layout: Draw a rough diagram of the room or area you need to measure. Don’t worry about perfect scale yet, just capture the overall shape and any alcoves, doorways, or obstructions.
- Divide into Simple Shapes: Mentally or physically divide the space into basic geometric forms: rectangles, squares, triangles, or circles. An L-shaped room, for instance, can be split into two rectangles.
- Measure Each Section:
- Rectangles/Squares: Measure the length and width of each rectangular section. Measure twice to confirm.
- Triangles: For a right-angle triangle, measure the base and height. For other triangles, you might need to use trigonometry or approximate by converting to rectangles, though this introduces more potential for error.
- Circles: Measure the radius (distance from center to edge) or diameter (distance across the center).
- Record Measurements Clearly: Write down each measurement directly onto your sketch. Label each section (e.g., ‘Section A: 10 ft x 12 ft’). Use consistent units (e.g., all in feet and inches, then convert inches to decimal feet).
- Calculate Area for Each Section:
- Rectangle/Square: Area = Length × Width.
- Triangle: Area = (Base × Height) ÷ 2.
- Circle: Area = π × Radius² (where π ≈ 3.14159).
- Sum the Areas: Add up the square footage of all individual sections to get the total area. If you subtracted any areas (like a cutout or an internal pillar), ensure those subtractions are correctly applied.
- Verify and Review: Walk through your measurements and calculations one last time. Does the total seem reasonable? A common practice is to have a second person independently measure and calculate, if possible.
Mastering Complex and Irregular Shapes
Not all rooms are perfect rectangles. Bay windows, angled walls, and circular features can quickly complicate a square footage calculation. The key is to avoid oversimplification.
For L-shaped rooms, the strategy is always to divide them into two or more rectangles. Measure the total length and width, then identify the ‘cutout’ section. You can calculate the area of the large rectangle and subtract the area of the cutout, or calculate the areas of the two smaller rectangles that make up the ‘L’ and add them together. For curved walls, treat them as a series of small, connected trapezoids or rectangles for approximation, or use the area formula for sectors if it’s part of a perfect circle.
When dealing with truly irregular spaces, such as a garden plot with organic curves, a technique called triangulation can be employed. This involves marking points around the perimeter and creating a series of triangles within the shape, then calculating the area of each triangle and summing them up. This method, while more labor-intensive, offers a higher degree of accuracy for non-standard forms.
Budgeting Beyond Square Footage: Material Waste and Overheads
Calculating the raw square footage of a space is only the first step in material estimation. Almost every project, from flooring to painting, requires accounting for waste. Materials might be cut incorrectly, damaged, or simply have an inefficient pattern that generates off-cuts.
Industry standards often recommend adding a surplus of 10-15% to your total square footage for most materials like flooring, drywall, or paint. For intricate patterns, unusual room geometries, or materials that are difficult to cut (e.g., large format tiles), this percentage might increase to 20% or even 25%. Failing to factor in this waste percentage can leave you short of materials, forcing you to purchase more at potentially higher prices or different dye lots, which can lead to visible discrepancies.
Pros and Cons of Relying Solely on Online Calculators
Pros
- Speed & Convenience: Quickly provides an answer for simple shapes.
- Automated Conversions: Easily switches between feet, meters, yards, etc.
- Cost Estimation: Many offer integrated cost per square foot calculations.
- Accessible: Available anywhere with internet access.
Cons
- Input Dependence: Accuracy relies entirely on user-provided measurements.
- Simplistic Geometry: Struggles with complex curves, angles, or multi-level spaces.
- No Waste Factor: Often doesn’t account for material waste percentages.
- Lacks Context: Doesn’t guide on measurement techniques or common errors.
Calculating Wall Square Footage for Painting or Drywall
Measuring for walls follows a slightly different approach than floor area. You need to calculate the area of each wall individually and then sum them up. This is critical for estimating paint, wallpaper, or drywall sheets.
For each wall, measure its length and its height from floor to ceiling. Multiply these two figures to get the square footage of that wall. Repeat for all walls. Then, for openings like windows and doors, measure their individual lengths and heights, calculate their square footage, and subtract these from the total wall area. This subtraction is crucial, as you won’t be painting or drywalling these openings. For a standard 8-foot ceiling, a 10×12 foot room has a perimeter of (10+12+10+12) = 44 feet, giving 44 x 8 = 352 square feet of wall space before subtracting windows/doors.
Common Blunders in Measuring and Calculating Square Feet
Even with the right tools, mistakes can happen. Recognizing these common pitfalls can save significant headaches down the line. One frequent error is not measuring at multiple points. Walls are rarely perfectly straight or parallel, so measuring a length only once can lead to inaccuracies. Always measure length and width at the top, middle, and bottom, then average the readings or use the largest dimension to be safe.
Another mistake is rounding prematurely. Keep your measurements as precise as possible until the final calculation. Rounding inches to the nearest foot too early can accumulate significant error, especially in larger areas. For instance, 6 inches is 0.5 feet, not 0 feet. Lastly, overlooking small architectural features like built-in cabinets or irregular alcoves can lead to material shortages or misfits. Ensure every unique dimension is captured.
Expert Strategies for Verifying Your Square Footage
Double-checking your work is paramount. After your initial calculation, consider these expert strategies to boost your confidence in the final square footage number. One effective method is to measure the space from different directions. For example, if you measured length first and then width, try measuring width first and then length to see if the dimensions align. This cross-verification often catches transcription errors or misreadings.
Another approach is to use a different tool for a second pass. If you used a tape measure initially, run a laser measurer over the main dimensions. In my years of advising on home projects, I’ve seen how often a simple second check with a different method reveals a forgotten offset or a measurement taken from the wrong point. For large or complex spaces, creating a scaled drawing on graph paper can visually highlight discrepancies that might be missed in raw numbers. According to the U.S. Census Bureau’s 2026 housing data, the median home size can vary widely by region, underscoring the importance of accurate individual property measurement rather than relying on averages.
Finally, always perform a ‘sanity check.’ If a 10×12 foot room calculates to 1,200 square feet instead of 120 square feet, you’ve likely made a decimal error. Compare your result to similar rooms you’ve measured or general guidelines for typical room sizes. For more advanced calculation scenarios, especially those involving property lines or official documents, consulting a professional surveyor or appraiser is always recommended. For details on calculating specific outdoor areas, exploring resources like a dirt calculator can provide further insights.
Frequently Asked Questions
What is the basic square footage formula?
The most basic square footage formula is Length × Width for a rectangular area. For example, a room that’s 10 feet long and 12 feet wide has a total of 120 square feet. This simple multiplication forms the foundation for calculating more complex areas.
How do I calculate square footage for an L-shaped room?
To calculate square footage for an L-shaped room, divide it into two or more distinct rectangles. Measure the length and width of each smaller rectangle, calculate their individual areas, and then add those areas together to get the total square footage of the L-shaped space.
Why is it important to add a waste percentage to square footage for materials?
Adding a waste percentage (typically 10-15%) to your square footage ensures you have enough material to account for cuts, mistakes, or damaged pieces. This prevents costly delays from re-ordering and ensures you have a consistent batch of material for the entire project.
Can I convert square feet to square meters or yards?
Yes, you can easily convert square feet to other units. To convert square feet to square meters, divide by 10.764. To convert square feet to square yards, divide by 9. Many online square footage calculator tools also offer built-in conversion features.
What tools provide the most accurate square footage measurements?
For the most accurate square footage measurements, a combination of a high-quality steel tape measure and a laser distance measurer is ideal. Laser measurers offer superior precision and speed for larger areas, while tape measures are essential for detailed, short-distance work and checking angles.
Does wall thickness affect square footage?
Wall thickness doesn’t affect the interior floor square footage of a room, which is measured from inside wall to inside wall. However, it significantly impacts the overall footprint of a house and is crucial for exterior measurements or when calculating total building area. For precise measurements, especially in real estate, knowing whether ‘square footage’ refers to interior usable space or total structural area is vital.
Is an online square footage calculator enough for large projects?
An online square footage calculator is a helpful tool for quick estimates and basic shapes. However, for large or complex projects, it should be used in conjunction with careful manual measurements and an understanding of geometry, waste percentages, and potential for error. Relying solely on a basic calculator can lead to significant cost overruns.
Conclusion
While a square footage calculator offers a convenient starting point, achieving true accuracy in area measurement is a skill that blends careful planning, the right tools, and an understanding of geometric principles. By adopting a systematic approach, accounting for waste, and double-checking your work, you can confidently calculate square footage for any project. This precision safeguards your budget, ensures smooth execution, and ultimately leads to more successful and satisfying outcomes for your home and renovation efforts.
Information current as of July 2026; pricing and product details may change.
Source: Britannica.
Knowing how to address square footage calculator early makes the rest of your plan easier to keep on track.
Related read: Yards to Metric: Mastering Conversions for Cost-Savvy Projects.